This post is part 1 of 4 covering Entity Framework Code-First for Beginners.
- Part 1 – Setting Up Entity Framework Code-First for Beginners
- Part 2 – Migrations in Entity Framework Code-First
- Part 3 – DbContext
- Part 4 – Entity Framework Code-First Extras
Entity Framework code-first doesn’t always get the love that database-first does for beginners but in this post, I will show how you can easily get up and running with code-first. This post is targeted towards beginners with little or no experience with code-first design and I will show how to set Entity Framework up in a real-world project.
Create a New Project
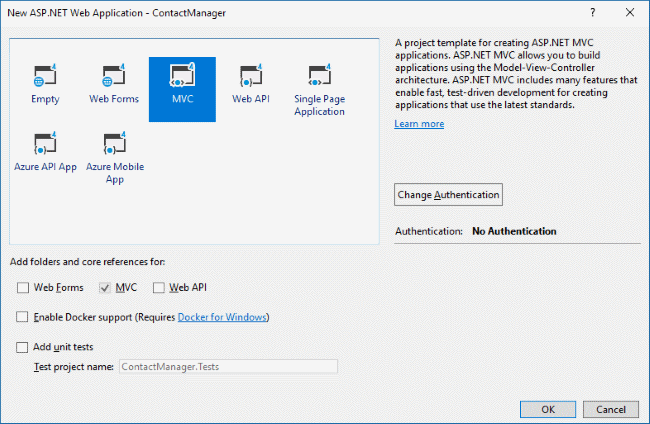
Let’s start by creating a new ASP.NET Web Application (.NET Framework) project and naming it ContactManager. If you would prefer, you can download the finished project from here.
![]()
Make sure that the MVC Project option is selected as below.
Reference Entity Framework
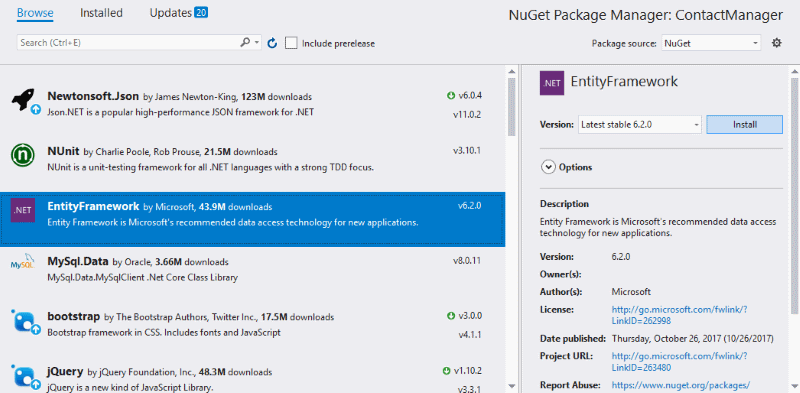
The first thing that we need to do is use NuGet to create a reference to Entity Framework. Right-click the ContactManager project and select the Manage NuGet Packages menu item. Click the Install button.
Setting Up the DbContext
Next, we need to create a DbContext that we can use to access our data. Add a folder named Code to the project. Add a sub-folder to the Code folder named Model. Add a new class to the Model folder and name it Contact. Below is the contents of Contact.cs.
namespace ContactManager.Code.Model
{
    public class Contact
    {
        public int ID { get; set; }
        public string FirstName { get; set; }
        public string LastName { get; set; }
        public string HomePhone { get; set; }
        public string MobilePhone { get; set; }
        public bool IsActive { get; set; }
    }
}
Add a class to the DataAccess folder and name it ContactManagerDbContext. This class will inherit from System.Data.Entity.DbContext. We also need to add DbSets<T> for our Contact model class. Below is the DbContext.
using ContactManager.Code.Model;
using System.Data.Entity;

namespace ContactManager.Code.DataAccess
{
    public class ContactManagerDbContext : DbContext
    {
        public DbSet<Contact> Contacts { get; set; }
    }
}
Setting Up the Connection String
Finally, before we can really use the DbContext for CRUD operations, we need to create the connection string for the context. In the web.config or app.config file, add a <connectionStrings>...</connectionStrings>section.
We will then add a new connection string. Like so:
<add name="ContactManager.Code.DataAccess.ContactManagerDbContext"
         connectionString="Data Source=(local);Trusted_connection=yes;Initial Catalog=ContactManagerData"
         providerName="System.Data.SqlClient" />
Pay attention to the name of the connection string. It is the fully qualified name of our DbContext from above. The namespace ContactManager.Code.DataAccess plus a dot and the name of the context ContactManagerDbContext.
Wrapping Up
That is all there is to it. In less than 2 minutes, you can be up and running with code-first and have ultimate control over your model objects. I always disliked database-first with EDMX for that very reason.
In the next post, I will show you what you need to know about Entity Framework migrations and how they can be useful.
Comments 4
Pingback: Entity Framework for Beginners Part 2 – Migrations – Edumacate Blog
Pingback: Entity Framework for Beginners Part 3 – DbContext | Edumacate Blog
Pingback: Entity Framework for Beginners Part 2 – Migrations | Edumacate Blog
Pingback: Entity Framework for Beginners Part 4 – Extras | Edumacate Blog