ASP.NET Core for Beginners – Utilizing Configuration Properties From The appsettings.json File

This post is part of a series for helping beginners get started with ASP.NET Core. You can find an updated list of topics in this series here.

In this post, we will learn how to read a simple value from a configuration file in ASP.NET Core.

Getting Started

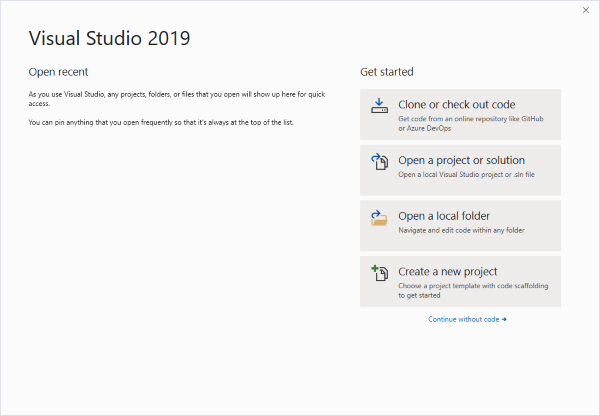
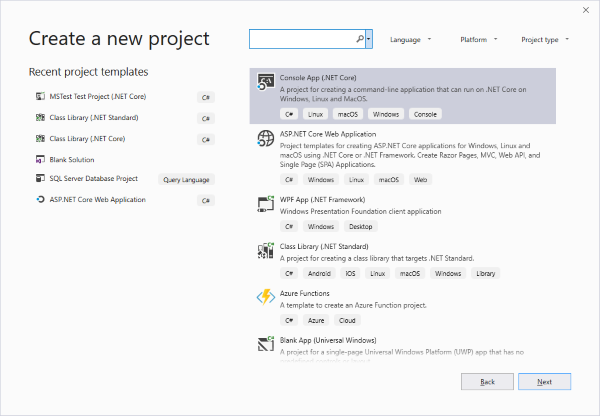
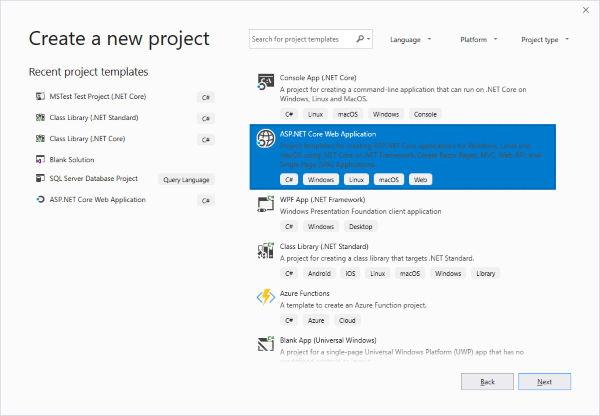
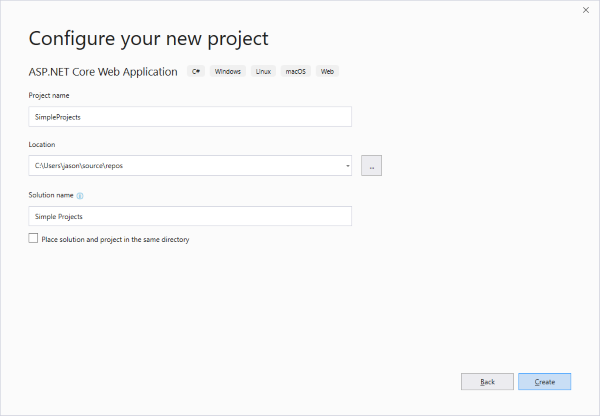
You will need to set up a new ASP.NET Core project. You can learn the specifics of that in the ASP.NET Core Series page linked to above in the post titled ASP.NET Core Project Setup.

Background

In order to get the most from this post, you should have a basic understanding of how dependency injection works in ASP.NET Core. It is important because we need access to the IConfiguration service in the Configure method of the application’s Startup.cs file.

If you are coming from a previous non-Core version of ASP.NET, you are accustomed to using the web.config file for application configuration. The web.config file has been replaced with the appsettings.json file. In case it isn’t plain, settings are no longer stored in XML. Now, we use JSON. The IConfiguration service unlocks the ability for us to use a variety of sources for configuration.

  1. Command Line Arguments
  2. Environment Variables
  3. Application Configuration (appsettings.json)
  4. User Secrets

Listing 1.1 – Configure Method Signature Changes

public void Configure(IApplicationBuilder app, IHostingEnvironment env, IConfiguration configuration)
{
    if (env.IsDevelopment())
    {
        app.UseDeveloperExceptionPage();
    }

    app.Run(async (context) =>
    {
        await context.Response.WriteAsync("Hello World!");
    });
}

So far, the only change is the IConfiguration configuration declaration. This will require you to add a reference to the Microsoft.Extensions.Configuration namespace.

Listing 1.2 – appsetttings.json Contents

{
  "Logging": {
    "LogLevel": {
      "Default": "Warning"
    }
  },
  "AllowedHosts": "*", 
  "Greeting":  "Greetings, Traveler!"
}

The important part here is the Greeting property. This is the value we want to pull out of the configuration file in our Configure method.

Listing 1.3 – Retrieving a Configuration Value

public void Configure(IApplicationBuilder app, IHostingEnvironment env, IConfiguration configuration)
{
    if (env.IsDevelopment())
    {
        app.UseDeveloperExceptionPage();
    }

    app.Run(async (context) =>
    {
        string greeting = configuration["Greeting"];

        await context.Response.WriteAsync(greeting);
    });
}

Finally, we come to it. The greeting variable retrieves the Greeting property from the appsettings.json file and we can then print it out to the browser.

Conclusion

In this post, we looked at how to retrieve configuration values and hopefully learned a bit about how the IConfiguration service works in ASP.NET Core.

Creating a New ASP.NET Core Project


This post is part of a series for helping beginners get started with ASP.NET Core. You can find an updated list of topics in this series here.

In this post, we will be starting creating a blank ASP.NET Core project from scratch. No fully feature templates here.

First, however, I want to talk about the application I will be building in this post series. The project will be simple enough for you to understand the requirements conceptually without us having to diagnose them point-by-point. And, thankfully, it isn’t a task management application. Hasn’t that already been done enough? The product we will be building is a very simple project management application. I don’t want to cover the requirements here because they are fairly simple but I will put a post up soon-ish to cover them.

Okay, back to the post. The first thing we want to do is launch Visual Studio. If you haven’t played around with it since installing it, you can expect it to look like the image below.

Figure 1.1 – Default Visual Studio 2019 Welcome Page

Click the ‘Create a new project’ button in the lower right. This will pop up the Create New Project Wizard dialog that will walk us through the process of creating our new project.

Figure 1.2 – Visual Studio 2019 Create a New Project Wizard Screen 1

Select the ASP.NET Core Web Application option. It is second in my list but it might not be in yours. You can use the search box at the top of the screen to filter the list if necessary or you can just scroll through the list and find it.

Figure 1.3 – ASP.NET Core Web Application New Project

Click the Next button. This will advance us to the part of the wizard where we name our project. You can see the options I have selected below.

Figure 1.4 – SimpleProjects Configuration Options

If you then click the Create button, we will advance to the last part of the wizard.

Figure 1.5 – SimpleProjects Project Options

Note that I have selected the Empty project template in the list box. Also, ensure that ASP.NET Core 2.2 is selected in the drop down at the top. I cannot guarantee that any other option will work for this project and tutorial series.

Click the Create button and Visual Studio will use the selected options to create a mostly empty project. There are a few files but no structures beyond the absolute minimum required to actually build and serve the web project.

Conclusion

That wraps up the project creation tutorial. In the next post we will see what ASP.NET Core serves up by default and how configuration works.

Installing ASP.NET Core 2.2 and Visual Studio 2019

Edit: This post was updated on 4/10/2019 to reflect the recently released Visual Studio 2019 instructions

Introduction

This post is part of a series demonstrating the entire process of creating an ASP.NET Core application. Visual Studio 2019 includes a free version for developers to use. It is a full-featured IDE and includes everything you need to develop software on Windows using the .NET Framework and the .NET Core Framework.

Start by opening a web browser to http://www.visualstudio.com. Once there, you can find the download link in the image below:

Make sure to select Community 2019 if you don’t have a valid license for Professional or Enterprise. Once the download has finished, start the installation process. Eventually, you will be met with a dialog like this:

Click the Continue button and you will see the below dialog pop up. This will start the download process to get the initially required files downloaded.

After this process is completed, you will be presented with the following dialog that allows you to control which components of Visual Studio and associated libraries to install.

Now, there are a lot of options in Visual Studio. What we want is unshadowed in the list below. You can install anything you want but make sure to include what I have highlighted. Also, every option you select will increase the amount of time it takes.

Finally, you will see a download dialog. Be patient until the process finishes.


Everything You Need to Know About the .NET Stack Collection Type

The Stack collection type is similar to other .NET collection types. It has it’s own use cases and is ideally suited to specific scenarios. In this post, I will demonstrate how to use the Stack collection type and go through some of the potential use cases.

What is the Stack Collection Type?

The Stack is a specialized collection that makes use of the three P’s: Peek, Push, and Pop. You may remember that the Queue collection type makes use of a first-in-first-out (FIFO) mechanism. The first item you add to the queue is the first item that can be removed. The Stack is completely opposite. The Stack uses a last-in-first-out (LIFO) mechanism. The last item you added to the stack is the first item that can be removed.

Manipulating Stacks

Manipulating a Stack is done, as already mentioned, by the three P’s.

Peek – Peek allows you to glance at the item at the top of the stack without removing it.

Push – Adds a new item to the Stack.

Pop – Removes and returns the top item on the Stack.

Listing 1.1 – The Three P’s

Stack<string> stringStack = new Stack<string>();

stringStack.Push("test-item-1");
stringStack.Push("test-item-2");
stringStack.Push("test-item-3");

Console.WriteLine(stringStack.Peek());

while (stringStack.Count() > 0)
{
    Console.WriteLine(stringStack.Pop());
}

Console.ReadLine();

First, I push three items into the stack. Then, do a peek to show that the item is not removed. Finally, loop through the stack and remove the items. This demonstrates all three P’s.

Listing 1.2 – Output from Listing 1.1

test-item-3
test-item-3
test-item-2
test-item-1

Conclusion

The Stack collection is very similar to the Queue collection. They each have a valid use case and the use cases generally revolve around the way items in the collection are consumed. First-in-first-out or last-in-first-out. Depending on your needs, selecting the correct collection type is as simple as knowing those two rules.

Everything You Need to Know About the .NET Queue Collection Type

The Queue collection type is a bit of a black sheep in the many different collection types. In some ways, it works exactly like you would expect any other .NET collection to work. However, in other ways, it seems to be very odd in its behavior. It will help if you remember that this is a Queue, not some ordinary collection.

What is a Queue?

A Queue is, in several ways, singular in its behavior. Yes, a Queue is a collection container. It can handle generics. What makes it different, though, is that once you put an object into a Queue, you have to be deliberate in how you remove it. The Queue collection type doesn’t have the usual Remove or RemoveAt extension methods. It doesn’t support indexers so queueItems[1] doesn’t work. It does support other extension methods such as Single and First.

Manipulating Queues

Queues support First-In-First-Out (FIFO) processing. You can only get items into the queue in one way: the Enqueue method. You can only remove items from the queue in one way: the Dequeue method.

Listing 1.1 – Adding Items to a Queue Using Enqueue

Queue<string> q = new Queue<string>();

q.Enqueue("test-1");
q.Enqueue("test-2");
q.Enqueue("test-3");

This will add three items to the collection.

Listing 1.2 – Removing Items from a Queue Using Dequeue

while (q.Count() > 0)
{
    Console.WriteLine(q.Dequeue());
}

This will simply keep calling the Dequeue method until there isn’t anything left in the Queue. However, remember the FIFO principle. The first item in is the first item out. See the output below.

Listing 1.3 – Output from Listing 1.2

test-1
test-2
test-3

As I already mentioned, you can get to the objects in the Queue easily enough. If you have objects instead of simple strings as I have in this example, you can write LINQ queries to get objects such as below.

Listing 1.4 – Getting Objects In A Queue

var selectedItem = q.First(i => i == "test-2");

Console.WriteLine("Selected Item: " + selectedItem);

This, of course, will just print out test-2 to the console.

Conclusion

Again, the Queue collection container is a bit odd but it definitely has valid use cases, mainly when the FIFO manner of objects needs to be preserved.

Everything You Need to Know About the .NET Dictionary Collection Type

The Dictionary collection, just like all the other specialized .NET collection types, has a wide range of use cases that it is perfectly suited to. This can make it difficult to pick between the different types because in many cases, one of several will do just fine. After this post, you should be able to recognize when the Dictionary type is a potential solution and how to implement and use it.

What is a Dictionary?

The dictionary collection type is similar to a real-world dictionary. In a physical dictionary, it is typically organized by word or term and each word or term has an underlying definition. It isn’t just a definition, though. It will typically have usage examples, a pronunciation guide, synonyms, antonyms, and so on. The dictionary collection type also has a term, called a key, and that key supports a backing value that could be a string, integer, object, class, or any other type. The key itself can be any type including a GUID, string, number, and so on.

How Do We Use a Dictionary?

In order to get to the object stored in the Dictionary, you need the key for that object. Assuming that our dictionary has a key of “test”, we can pull out the value stored in the dictionary for “test” simply.

Figure 1.1 – Accessing Items of the Dictionary by Key

Dictionary<string, string> dictValues = new Dictionary<string, string>();

dictValues.Add("test", "test-value");
dictValues.Add("test2", "test2-value");

Console.WriteLine(dictValues["test"]);

As you can see in the code above, you have to declare the types of both the key and the value when the dictionary is created. The first string is the key and the second is the value being stored. Again, neither of these types need to be a string. They can be almost anything.

Figure 1.2 – Output from Listing 1.1

test-value

Sometimes you will know what the keys in your dictionary are and sometimes, you won’t. Strictly speaking, there are valid scenarios from a design perspective where you will not know or have access to the keys. One common situation would be where you are storing objects by key and need to keep track of them but you don’t know at design time what those object values will be such as a caching mechanism. In this type of application, if your dictionary has the object, you can retrieve it. If it doesn’t, you will need to look it up and then add it to the dictionary. Getting a list of the keys is also fairly straightforward.

Figure 1.3 – Retrieving a List of Dictionary Keys

var keys = dictValues.Keys;

foreach (var key in keys)
{
    Console.WriteLine(key);
}

This code will get the keys for the dictionary, loop through those keys, and print them out to the Console.

Figure 1.4 – Output from Figure 1.3

test
test2

Finally, you will most likely need to test whether or not the dictionary has a specific key added or not and potentially a stored value or not.

Figure 1.5 – ContainsKey and ContainsValue Usage

if (dictValues.ContainsKey("test"))
{
    Console.WriteLine(dictValues["test"]);
}

if(dictValues.ContainsValue("test2-value"))
{
    Console.WriteLine("Dictionary contains test2-value");
}

if(dictValues.ContainsValue("test3-value"))
{
    Console.WriteLine("test3-value");
}

In the code above, the first two tests should pass but the third should fail.

Figure 1.6 – Output from Figure 1.5

test-value
Dictionary contains test2-value

Conclusion

Though lesser known and rarely used, the Dictionary collection is a powerful addition to your toolbelt. After you discover the dictionary type, suddenly you will spot valid scenarios for its use all around you.

Interface vs Abstract Class in C#

If you are confused about the difference between an Interface and an Abstract class, you are not alone. It is a popular topic and a common dilemma for beginners. Even experienced developers may not be able to answer the question ‘When do I choose one over the other?’. After this post, however, you should be able to.

What is an Interface?

An Interface is a declaration of events, methods, and properties but not the implementation of those things. Think of it as an outline. It is directing you as to what you must do but not dictating the how to you. I also like to refer to Interfaces as contracts because that is what they are. Contracts are written or spoken agreements that are enforceable by law. By implementing an Interface, you are agreeing to implement the events, methods, and properties of that contract. Notice the terminology surrounding the Interface. Implementation is an important word. The word implements describe exactly what you do to an interface. Since the interface does not contain its own implementation, you must provide that implementation. It may also be helpful to remind you that C# does not support multiple inheritance. Since an interface is not inherited but implemented, this limitation does not have any effect on interfaces. A class can implement many different interfaces but can only inherit from a single class, abstract or otherwise.

What is an Abstract Class?

An abstract class is sometimes referred to as a base class. It cannot be instantiated so it must be inherited and it is created with the intention that it be inherited and extended. It will (usually) provide some of its own implementation but not all. The events, methods, and properties that you must implement yourself are marked as virtual. An abstract class can also be considered a contract, really. The nature of the abstract class means that it is forcing any child class that inherits from it into a specific set of rules but may also provide some implementation.

Why so confusing? Which do I choose?

On the surface, it may seem like interfaces and abstract classes are very similar and you would be right but it stops at the surface. An interface defines what you can do while an abstract class defines what you are.

Let’s look at a very simple example such as vehicles. A vehicle can be a car, a truck, a bus, or a plane. These are WHAT the objects in the hierarchy are. So, in this case, an abstract class such as AVehicle might be warranted. A vehicle might move, fly, or float. Since these are behaviors, IFly, IMove, and IFloat would all be acceptable interfaces.

The simplest way to distinguish between an interface and an abstract class is to ask that very simple question: Does it define what I do (interface) or what I am (abstract class)?


Dealing With Command Line Arguments in C#

The Console Project template is often overlooked and rarely loved but, the power it possesses is amazing. If you don’t mind not working without a user interface, that is. Not all processes need human interaction, though. As a professional software developer, I have encountered many different scenarios where that is the case. I actually enjoy these projects because they have an entire level of sophistication removed from them: the user interface. What is left is just me and the code. Keep in mind, that in this post, we are only dealing with console applications.

What Are Command Line Arguments

Command line arguments are passed to a console application that can then be parsed by the application and, if the argument is both expected and within a known range of options, ask the application to execute in specific ways. The signature for the Main() method is the entry point of the application and the default signature allows these arguments.

Figure 1.1 – The default main() method signature

static void Main(string[] args)
{
}

As long as you can pass your argument as a string, the application can handle it.

Command Line Argument Basics

If you right-click a console application project in Solution Explorer and click the Properties menu option, you will see the tabbed Project Properties options.

Figure 1.2 – Project Properties

Click the Debug tab and you will see the Start Options section. This is where you can pass in command line arguments to your applications for debugging purposes. Now, in the Main() method, if we add a simple loop to go through the arguments and print out each argument, what will see based on the Hello World arguments as above?

Figure 1.3 – Main() method to print out command line arguments

static void Main(string[] args)
{
    foreach(string arg in args)
    {
        Console.WriteLine(arg);
    }

    Console.ReadLine();
}

Figure 1.4 – Hello World output

Hello
World

If the arguments are entered as separate words, they are considered separate arguments. You can get around this by wrapping the text in double quotes: “Hello World”. This would print out a single argument.

Moving Beyond The Basics

If your console application accepts command line arguments and especially if there is more than one possible argument, you will soon find that you can’t just accept them as they come. You will likely need named arguments. You see this sometimes in other console applications. For example, perhaps a possible argument is -t or -f or -file with the very next argument as the file name. As a basic exercise, I am going to create a simple program that can handle five different arguments. What these arguments are doesn’t really matter as the basic concepts will be the same regardless of what they are or what they do.

First, I am going to check for one of two possible arguments: /help or /?. It can be assumed that if either of these commands appears, the user is looking for help. This will cause the console to display pre-formatted help text. If either of the help arguments is present, all others will be ignored. Also, I am going to test for exit argument. Again, if this argument is present, we don’t have to worry about checking for any others. The other arguments, as you will see below, are -f or /file to specify a file name and -t. If the -t argument is present, the program will check to ensure that the file exists. If the -t argument is not present, that check will be skipped. These are just possible paths to show how certain things can be done. There are limitless possibilities really.

Listing 1.5 – Command Line Argument Parser

public class CmdLineArgHandler
{
    private List<string> arguments = null;
    private bool switchToggled = false;
    private bool fileExists = false;
    private string fileName = string.Empty;

    public CmdLineArgHandler(string[] args)
    {
        arguments = args.ToList().Select(x => x.ToLower()).ToList();
    }

    public void Start()
    {
        if(arguments.Contains("/help") || arguments.Contains("/?"))
        {
            DisplayHelp();
        }
        else if(arguments.Contains("/exit"))
        {
            return;
        }
        else
        {
            if(arguments.Contains("-t"))
            {
                switchToggled = true;
            }

            if(arguments.Contains("-f") || arguments.Contains("/file"))
            {
                int index =  arguments.IndexOf("/file");

                fileName = arguments[index + 1];

                if(switchToggled)
                {
                    fileExists = new System.IO.FileInfo(fileName).Exists;
                }
            }

            if(switchToggled)
            {
                Console.WriteLine("Switch Toggled.");

                if(fileExists)
                {
                    Console.WriteLine("File exists");
                }
                else
                {
                    Console.WriteLine("File does not exist");
                }
            }
        }
    }

    private void DisplayHelp()
    {
        Console.WriteLine("Sample Help Text");
        Console.WriteLine("");
        Console.WriteLine("/help or /?\t\tDisplay this help text");
        Console.WriteLine("");
        Console.WriteLine("-t\t\t\tTurns on a toggle that does something amazing");
        Console.WriteLine("");
        Console.WriteLine("-f or /file\t\tPath to a file");
        Console.WriteLine("");
        Console.WriteLine("/exit\t\t\tExit the program");
        Console.WriteLine("");
        Console.ReadLine();
    }
}

Conclusion

This isn’t a complicated topic, honestly. It is one, however, that requires a systematic approach. The power of console applications will not be questioned by those that have used them before and using the tactics touched on in this article, the sky is the limit.

A List of Great C# Git Repos

Most Popular

These repos are some of the most popular C# repositories. You are likely familiar with most of these by reputation at least.

  1. .NET Core – This is the granddaddy of C# open source projects. The .NET Core Framework.
  2. Roslyn – This is the project that performs code analysis for C# and Visual Basic.
  3. Mono – The original cross-platform open source .NET Framework created a very long time ago by one of the smartest guys on the plant: Miguel de Icaza. It was incredibly ambitious and it has, by all rights, succeeded.
  4. MonoGame – Another really ambitious project. Its aim was to create a framework for developing cross-platform games. It was loosely modeled on Microsoft’s XNA Platform.
  5. ASP.NET Core – The repo covering the port from ASP.NET to ASP.NET Core.
  6. Xamarin – The Xamarin mobile development platform that allows C# developers to create cross-platform mobile apps that eventually compile into native code. Xamarin is among the best mobile application development tools available. I don’t know why it doesn’t get more press. It is amazing.
  7. CoreCLR – This is the runtime for .NET Core.
  8. WPF – The Git repo for the WPF framework.
  9. WCF – The source repo for the WCF framework.
  10. Entity Framework Core – The Git repo for the port of Entity Framework to Entity Framework Core.

Interesting

It is less likely that you have heard of these projects but some of them are very, very interesting.

  1. ML.NET – Microsoft’s machine learning framework for .NET.
  2. Avalonia – A very interesting project for creating a cross-platform UI framework.
  3. dnSpy – A .NET debugger and assembly editor.
  4. SmartStore.NET – An open source e-commerce solution. This is still ASP.NET MVC but interesting none the less.
  5. Kudu – A very useful project inside and out of Azure.

An Introduction to System.Reflection

In this post, we will look at several common usage scenarios for System.Reflection.

Late Binding

Late binding is simply runtime binding. You may not have access to the assembly at compile time. You can likely expect it to appear a certain way. You have to know something about the assembly, after all. Late binding is common in systems that may have interchangeable components. For example, a plug-in system. Your application may support plug-ins that conform to a specific standard such as the plug-in must implement a specific interface which allows your application to instantiate the plug-in. The plug-in may be anything. you have no way of knowing anything about it while you are creating the application but as long as it has the Start method, you can instantiate it.

Listing 1.1 – Simple Plugin System

internal void Load()
{
    string pluginDirectory = Path.Combine(AppDomain.CurrentDomain.BaseDirectory, "Plugins");

    DirectoryInfo pluginFolder = new DirectoryInfo(pluginDirectory);

    FileInfo[] plugins = pluginFolder.GetFiles("*.dll");

    foreach (FileInfo plugin in plugins)
    {
        Assembly assembly = Assembly.LoadFile(plugin.FullName);
        Type[] types = assembly.GetTypes();

        foreach (Type t in types)
        {
            try
            {
                IPlugin ip = (IPlugin)Activator.CreateInstance(t);
                ip.Start("Sample message from main system");
            } 
            catch(MissingMethodException)
            {
                Console.WriteLine(t.FullName + " is not a plugin.");
            }
        }
    }
}

In this short example, Reflection is used to load the assembly and then interrogate the assembly to get the Types the assembly contains. Then, we attempt to call the Start method on each Type. For this example, I created an interface named IPlugin and created two different plugins and then moved those assemblies to the bin\Plugins directory along with the assembly containing the IPlugin interface.  Below is the output from this code.

Listing 1.2 – Plugin System Output

Press any key to load plugins...
Hello from Plugin1: Sample message from main system
Hello from Plugin2: Sample message from main system
PluginUtilities.IPlugin is not a plugin.

Property Inspection

Another scenario that is very common for Reflection and one that most .NET developers will encounter at some point is property inspection. System.Reflection gives developers the ability to interrogate unknown assemblies, classes, etc and find out most of what there is to know about them at runtime.

The below code builds upon what is in Listing 1.1 to load each assembly in the plugins folder, loop through them, get all the different types in the assembly, loop through those, print out their full name, and then, finally, loop through all the methods on the type and print out a list of those as well.

Listing 1.3 – Property Inspection

internal void Load()
{
    string pluginDirectory = Path.Combine(AppDomain.CurrentDomain.BaseDirectory, "Plugins");

    DirectoryInfo pluginFolder = new DirectoryInfo(pluginDirectory);

    FileInfo[] plugins = pluginFolder.GetFiles("*.dll");

    foreach (FileInfo plugin in plugins)
    {
        foreach (Type t in Assembly.LoadFile(plugin.FullName).GetTypes().ToList())
        {
            Print(t);
        }
    }
}

private void Print(Type t)
{
    Console.WriteLine($"Full Name: {t.FullName}");

    foreach(MethodInfo method in t.GetMethods().ToList())
    {
        Console.WriteLine($"Method: {method.Name}");
    }
}

Listing 1.4 – Property Inspection Output

Full Name: PlugIn1.Tool
Method: Start
Method: ToString
Method: Equals
Method: GetHashCode
Method: GetType
Full Name: Plugin2.Tool
Method: Start
Method: ToString
Method: Equals
Method: GetHashCode
Method: GetType
Full Name: PluginUtilities.IPlugin
Method: Start

Notice that the default object methods are included such as ToString, Equals, GetHashCode, and GetType. There are similar methods on the Type object for Constructors, Members, Interfaces, Custom Attributes, Fields, Events, and so on. Using this approach, you can find out almost everything there is to know about an assembly.

Conclusion

I hope this post has been informative. If you work with .NET long enough, you will be required to do this at some level. It is just too useful to pass by without using.